How To Configure Ccproxy
Installation of proxy server software CCProxy – Youngzsoft
2017/11/07 02:25
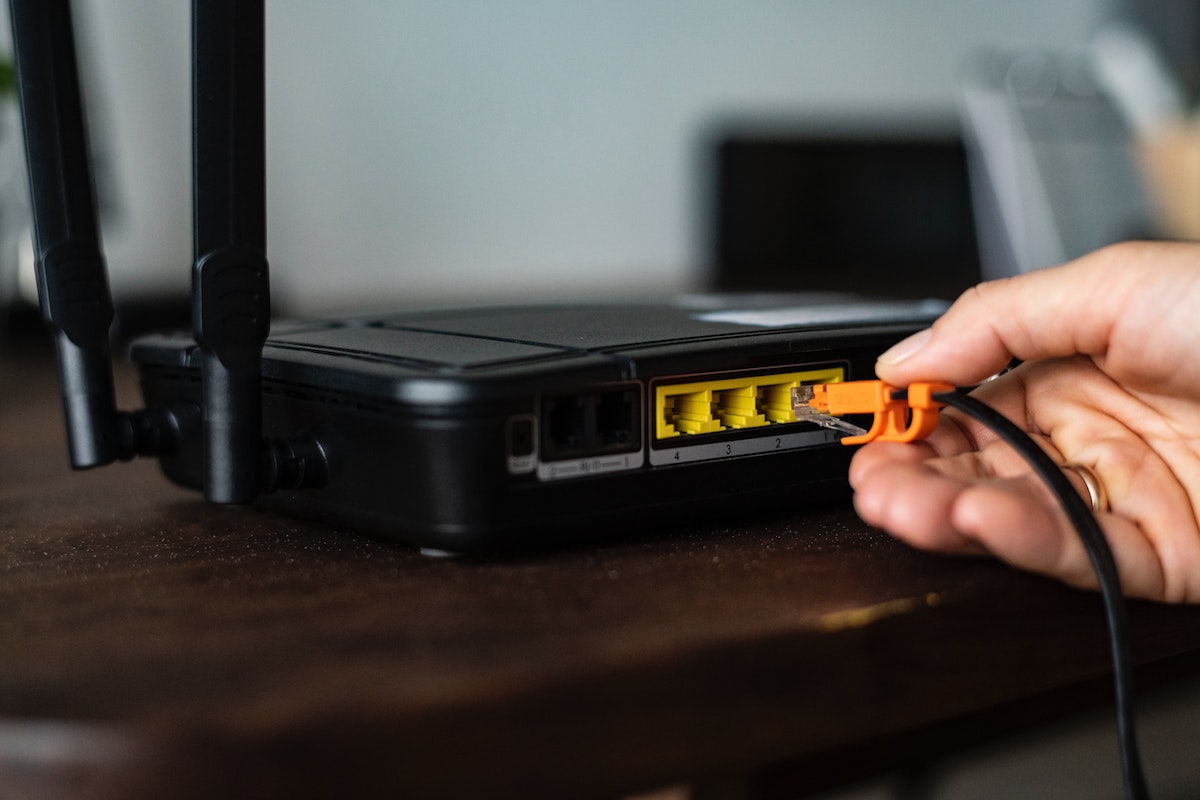
Step 1 – LAN networks configurationNormally, the clients and server are connected with A Hub, Wireless Hub, Switch or Router. The network protocol between the server and clients is TCP/IP. Therefore both the server and the clients have an IP address. The server IP address is static and fixed. The clients IP address can be fixed or dynamic which is obtained through DHCP. CCProxy only requires that the clients can ping through the server IP address. We know that the server may have multiple IP addresses, but must have one that is used to connect with other LAN clients. The IP address that is used to connect with the other LAN client is called the proxy server address. We generally assumed this to be CCProxy only supports IPv4 IPs and doesnot support using the clients and server have not yet been setup to have a connection, we recommend allocate IP addresses like this at below: IP ient99192. 168. 0. 100255. 255. 0192. 1192. 1How to detect whether ping Requests are transferring through between the clients and server? At the client, in the “start” menu -> “run” -> “cmd”, assuming that the server IP is 192. 1, in the command line, to type “ping 192. 1” then press return. If the result is similar to that at below, it means the client is connected to the server ging 192. 1 with 32 bytes of data:Reply from 192. 1: bytes=32 time=2ms TTL=150Reply from 192. 1: bytes=32 time=7ms TTL=150Reply from 192. 1: bytes=32 time=7ms TTL=150Ping statistics for 192. 1:Packets: Sent = 4, Received = 4, Lost = 0 (0% loss), Approximate round trip times in milli-seconds:Minimum = 2ms, Maximum = 7ms, Average = 4msIf the result is like that at below, it means the client cannot connect to the ging 192. 1 with 32 bytes of data:Request timed quest timed quest timed quest timed statistics for 192. 1:Packets: Sent = 4, Received = 0, Lost = 4 (100% loss), If the client cannot connect to the server, you need to check the IP address settings and the connections to the Hub, Switch or Router on the clients and 2 – Internet connection configurationWe know that there are many ways of connecting to the Internet, which are for example, ADSL, optical fiber, satellite, broadband etc. CCProxy is not concerned about the manner in which the Internet connection is established, as long as the server is successful connected to the simplest way to check the server can access the Internet is to input a web site address into the browser and see if the machine is able to access the web frequently mentioned single and dual NIC. In fact, the CCProxy is not concerned with hardware equipment. Both single and multi-NIC cards are supported and there are no special settings. Special mention is that if the clients have been able to share the Internet, such as through the router, and hope to use the CCProxy to manage and control the clients’ Internet access. You might need to do some changes on your example:(Figure 1)In this case, the clients can access the Internet directly with the Routers bypass proxy server. That’s to say, CCProxy cannot control the clients. We need to isolate the client from Internet and force clients to access the Internet via the proxy have two methods to realize 1:Add one NIC card on the server and change the LAN networks as:(Figure 2)Method 2:Configure the NAT or route settings in the router and block all LAN IP address accessing the Internet directly except the server IP address. Only some advanced routers have this function. Please do this with the router’s CCProxy uses local IP addresses and not Public IP address to relay traffic. So, if you have multiple internet connection then you need to use multiple router and NIC on server to use the internet traffic through 3 – Install CCProxy on the ServerSuppose the server IP address in the LAN is 192. 1, and then 192. 1 is the proxy server can download CCProxy here. Run and follow the on-screen instructions to install CCProxy on the server (Figure 3). (Figure 3)If you want to know more about server configurations, please read “Server Configuration” you get problem in launch CCProxy, please refer to “CCProxy Start Problem” 4 – Add client’s IP into CCProxyChoose one computer in the LAN that needs to access the Internet. Suppose the IP address of the computer is CCProxy main window, click “Account” button, then popup “Account Manager” dialog “Permit Only” in “Permit Category” and select “IP Address” in “Auth Type” (Figure 4). (Figure 4)Click “New” button, fill “192. 2” in the “IP Address/IP Range”, click “Save” and “OK” button (Figure 5). (Figure 5)If you want to know more about account management, please read “Account Manager” 5 – Configure IE at clientGo to client computer and open IE “Tools” menu, select “Internet Options” and open the “Internet Options” dialog “Connections” tab, click “LAN Settings” button and open the “Local Area Network (LAN) Settings” dialog box (Figure 6). (Figure 6)Check “Use a proxy server for your LAN”, Fill “192. 1” in “Address” and “808” in “Port” (Figure 7). (Figure 7)Click “OK” button in “Local Area Network (LAN) Settings” and “Internet Options” dialog you can browser Internet web sites in IE at the you want to know more about client configurations, please read “Client Configuration” you get problem in using CCProxy, please read “User Manual” and “FAQs”.
Related:
CCProxy User Manual
Published on July 2016 | Categories: Types, Books – Non-fiction | Downloads: 16 | Comments: 0 | Views: 826
CCProxy
Proxy Server for Win98/NT/2000/XP/2003/Vista/2008
User Manual
2009. 01
CCProxy – Proxy Server Software for Windows
1 Content
1 2 3 4 Content…………………………………………………………………………………………………………………….. 1 Introduction………………………………………………………………………………………………………………. 3 Main Features……………………………………………………………………………………………………………. 4 Installation………………………………………………………………………………………………………………… 5 4. 1 Step 1 – LAN networks configuration…………………………………………………………….. 2 Step 2 – Internet connection………………………………………………………………………….. 6 4. 3 Step 3 – Install CCProxy software at server…………………………………………………….. 7 4. 4 Step 4 – Configure IE browser proxy settings at clients…………………………………….. 8 Client Proxy Configuration…………………………………………………………………………………………. 9 5. 1 IE (Internet Explorer)…………………………………………………………………………………… 2 Firefox……………………………………………………………………………………………………… 10 5. 3 Outlook Express for free mail……………………………………………………………………… 11 5. 4 Outlook Express for company mail………………………………………………………………. 13 5. 5 Outlook Express for Gmail…………………………………………………………………………. 16 5. 6 Office Outlook………………………………………………………………………………………….. 7 Outlook Express for News (NNTP)……………………………………………………………… 17 5. 8 CuteFTP…………………………………………………………………………………………………… 9 CuteFtp Pro………………………………………………………………………………………………. 10 ICQ………………………………………………………………………………………………………….. 11 MSN Messenger………………………………………………………………………………………… 12 Voice/video chat software…………………………………………………………………………… 13 NetMeeting……………………………………………………………………………………………….. 18 5. 14 Real Player……………………………………………………………………………………………….. 15 Windows Media Player………………………………………………………………………………. 20 5. 16 NetTerm for BBS telnet………………………………………………………………………………. 22 5. 17 Java application for Game/Chat room…………………………………………………………… 18 Norton AntiVirus for live update………………………………………………………………….. 23 5. 19 AVG update………………………………………………………………………………………………. 20 Windows XP update…………………………………………………………………………………… 21 Other software…………………………………………………………………………………………… 23 Account Management………………………………………………………………………………………………. 25 6. 1 Account Manager………………………………………………………………………………………. 2 Create New Account………………………………………………………………………………….. 3 Web Filter…………………………………………………………………………………………………. 26 6. 4 Time Schedule…………………………………………………………………………………………… 27 Main interface…………………………………………………………………………………………………………. 28 7. 1 Toolbar Zone…………………………………………………………………………………………….. 2 Online Information Zone…………………………………………………………………………….. 3 Product Logo Zone…………………………………………………………………………………….. 4 System Information Zone……………………………………………………………………………. 28
1
5
6
7
8 9
Options dialog box…………………………………………………………………………………………………… 29 Advanced Options……………………………………………………………………………………………………. 30 9. 1 Dial-up Page……………………………………………………………………………………………… 2 Cache Page……………………………………………………………………………………………….. 3 Cascading Page…………………………………………………………………………………………. 4 Log Page………………………………………………………………………………………………….. 31 9. 5 Mail Page…………………………………………………………………………………………………. 6 Networks Page………………………………………………………………………………………….. 7 Others Page………………………………………………………………………………………………. 32 10 CCProxy Online Monitor…………………………………………………………………………………… 33 11 Log Analysis…………………………………………………………………………………………………………… 34 12 Contact……………………………………………………………………………………………………………. 35
2
2 Introduction
Proxy Server CCProxy is easy-to-use and powerful Internet connection sharing software. Supporting broadband, DSL, dial-up, optical fiber, satellite, ISDN and DDN connections, it helps you build your own proxy server and share Internet access within the LAN efficiently and easily. CC Proxy Server can act as HTTP, mail, FTP, SOCKS, news and telnet proxy server. And It features powerful account management functions, including Internet access control, bandwidth control, Internet web filtering, content filtering and time control. It also provides web caching, online access monitoring, access logging and bandwidth usage statistics functions. CC Proxy is compatible with Win98, WinME, WinNT, Win2000, WinXP, Win2003, Vista and Win2008.
3
3 Main Features
1. Modem, Cable Modem, ISDN, ADSL, Satellite, DDN and so on are supported. 2. HTTP, FTP, Gopher, SOCKS4/5, Telnet, Secure (HTTPS), News (NNTP), RTSP and MMS proxy are supported. 3. Port Mapping is supported. 4. Web cache can enhance browsing speed. The size and refresh time of the cache can be easily changed. 5. Bandwidth control flexibly manages the traffic usage of clients. 6. Time schedule can easily control the clients’ on-line time 7. Web filter can ban the specified web sites or content. It can also name specific web sites for browsing. 8. URL filtering prevents users from downloading files with designated extensions via IE. 9. There are seven types of account authentication: IP address, IP range, MAC address, User Name/Password, IP + User Name/Password, MAC + User Name/Password and IP + MAC. 10. Parent proxy function enables CCProxy to access the Internet via another proxy. 11. Dial-On-Demand, remote dial up and auto disconnect are supported. 12. Access Logging can keep a full record of the Internet access log. 13. It enables IE and Netscape to access the Internet through HTTP/Secure/FTP (Web)/Gopher. 14. SOCKS5 proxy support allows use of ICQ, MSN Messenger, Yahoo Messenger, CuteFTP, CuteFTP Pro and WS-FTP. 15. Mail proxy supports Outlook, Eudora etc. 16. Supports NetTerm accessing the Internet via Telnet proxy. 17. Supports Outlook connecting to the News server via News proxy. 18. Support SOCKS5 and web authentication. 19. Support for Real Player RTSP proxy and Media Player MMS proxy. 20. Built-in DNS can resolve domain names. 21. Win98/WinMe/WinNT/Win2000/WinXP/Win2003/Vista compatible. 22. Bandwidth usage statistics.
4
4 Installation
4. 1 Step 1 – LAN networks configuration
Normally, the clients and server are connected with A Hub, Wireless Hub, Switch or Router. The network protocol between the server and clients is TCP/IP. Therefore both the server and the clients have an IP address. The server IP address is static and fixed. The clients IP address can be fixed or dynamic which is obtained through DHCP. CCProxy only requires that the clients can ping through the server IP address. We know that the server may have multiple IP addresses, but must have one that is used to connect with other LAN clients. The IP address that is used to connect with the other LAN client is called the proxy server address, We generally assumed this to be 192. 168. 0. 1. If the clients and server have not yet been setup to have a connection, we recommend allocate IP addresses like this at below:
IP ADDRESS Server Client1 Client2… Client99 192. 1 192. 2 192. 3…
MASK
GATEWAY
DNS empty 192. 1… 192. 1
255. 255. 0 empty 255. 0 192. 1 255. 1……
192. 100 255. 1
How to detect whether ping Requests are transferring through between the clients and server? At the client, in the “start” menu -> “run” -> “cmd”, assuming that the server IP is 192. 1, in the command line, to type “ping 192. 1” then press return. If the result is similar to that at below, it means the client is connected to the server successfully.
PINGING 192. 1 WITH 32 BYTES OF DATA: REPLY FROM 192. 1: BYTES=32 TIME=2MS TTL=150 REPLY FROM 192. 1: BYTES=32 TIME=7MS TTL=150 REPLY FROM 192. 1: BYTES=32 TIME=7MS TTL=150 PING STATISTICS FOR 192. 1: PACKETS: SENT = 4, RECEIVED = 4, LOST = 0 (0% LOSS), APPROXIMATE ROUND TRIP TIMES IN MILLI-SECONDS: MINIMUM = 2MS, MAXIMUM = 7MS, AVERAGE = 4MS
If the result is like that at below, it means the client cannot connect to the server.
PINGING 192. 1 WITH 32 BYTES OF DATA: REQUEST TIMED OUT. REQUEST TIMED OUT. PING STATISTICS FOR 192. 1: PACKETS: SENT = 4, RECEIVED = 0, LOST = 4 (100% LOSS),
If the client cannot connect to the server, you need to check the IP address settings and the connections to the Hub, Switch or Router on the clients and server.
4. 2 Step 2 – Internet connection
We know that there are many ways of connecting to the internet, which are for example, ADSL, optical fiber, satellite, broadband etc. CCProxy is not concerned about the manner in which the Internet connection is established, as long as the server is successful connected to the Internet.
The simplest way to check the server can access the Internet is to input a web site address into the browser and see if the machine is able to access the web pages.
Users frequently mentioned single and dual NIC. In fact, the CCProxy is not concerned with hardware equipment. Both single and multi-NIC cards are supported and there are no special settings.
Special mention is that if the clients have been able to share the Internet, such as through the router, and hope to use the CCProxy to manage and control the clients’ Internet access. You might need to do some changes on your hardware.
For example:
CLIENTS
ROUTER
SERVER
Internet
or
HUB(SWITCH)
Router Internet
In this case, the clients can access the Internet directly with the Routers bypass proxy server. That’s to say, CCProxy cannot control the clients. We need to isolate the client from Internet and force clients to access the Internet via the proxy server. We have two methods to realize this.
Method 1:
Add one NIC card on the server and change the LAN networks as:
INTERNET
Or
Method 2: Configure the NAT in the router and block all LAN IP address accessing NAT except the server IP address. Only some advanced routers have this function. Please do this with the router’s administrator.
4. 3 Step 3 – Install CCProxy software at server
Please download the latest version of CCProxy’s installation package from our site first. Running the installation package at server will install CCProxy to C:CCProxy by default. Launch CCProxy and open the “options”, the proxy server address is displayed in the “Local LAN IP address”. Please check whether it’s the proxy server address or not. If not, please uncheck “Auto Detect”. Select the correct proxy server IP address from the drop-down list and check the checkbox on the right side. Now, CCProxy has been installed on the server with default settings, CCProxy will permit
all clients access Internet. If you want to manage the clients, please read “Account Management”. If you get problem in launch CCProxy, please refer to “FAQs”.
4. 4 Step 4 – Configure IE browser proxy settings at clients
At the clients machine, please open IE menu “Tools”, go to “Internet Options” -> “Connections” -> “LAN settings”, select “proxy server”, input the proxy server IP address in the “Address”, 808 in the “Port”. Select “local address bypass proxy”. IE proxy setup is finished and we can access websites via the proxy now. For other network applications’ proxy settings, please refer to “Client Proxy configuration”.
8
5 Client Proxy Configuration
In this section, we will talk about the proxy settings of client software. CCProxy is proxy server software. If the client wants to access the Internet via CCProxy, some proxy settings need to be set up in the client software. Below we provide guides for proxy settings for popular client software. Each guide is based on the assumption that the proxy address is 192. If you know other client software’s proxy settings, please email us. We will publish them on our site for the benefit of other users.
5. 1 IE (Internet Explorer)
Launch IE -> menu “Tools” -> “Internet Options” -> “Connections” -> “LAN settings” -> choose “use a proxy server” -> “advanced” -> “servers” -> add” server address” to “HTTP”, “Secure”, “FTP”, “Gopher”, Port is 808; add “server address” to “Socks”, Port is 1080.
9
5. 2 Firefox
“Tools” -> “Options” -> “General” -> “Connections Settings”: Select “Manual proxy configuration”, SOCKS Host:192. 1, Port:1080 and select “SOCKS v5”. The other editboxes leave blank.
10
5. 3 Outlook Express for free mail
Suppose email address is [email protected] Mailbox account: support Password: *********** SMTP address: POP3 address: Proxy server address: 192. 1 Launch Outlook Express. Menu “Tools”–> “Accounts”–> “Mail” Tab
Select account and click button” Properties”. The general info should be shown as below:
11
Go to “Server” tab. The info should be shown as below.
12
Pay attention to the account name of “Incoming Mail Server”. Click button “Settings”. If your original mail server requires authentication when sending emails, you need to configure as below. Pay attention to the account name. It is “” here.
If your original mail server doesn’t require authentication when sending emails, then configure as below. It is “” here.
5. 4 Outlook Express for company mail
Suppose email address is [email protected] Mailbox account: [email protected] Password: *********** SMTP address: POP3 address: Proxy server address: 192. Menu “Tools”–> “Accounts”–> “Mail” Tab
13
Go to “Server” tab. Configure as below. Pay attention to account name. It should be “[email protected]” here.
14
Pay attention to the account name of “Incoming Mail Server”. It should be “[email protected]” here.
15
5. 5 Outlook Express for Gmail
CCProxy-> “Options” -> “Port Map”, click the “E” button and add two port map rules: 1) Dest Host:, Dest Port: 465, Type: TCP, Local Port: 465. 2) Dest Host:, Dest Port: 995, Type: TCP, Local Port: 995. In Outlook Express account property, set smtp and pop3 server address as the proxy address (i. e. 1).
5. 6 Office Outlook
Suppose your mail account information is login user name(account):aaa login password:bbb pop3 server address(incoming server address):ccc smtp server address(outcoming server address):ddd smtp login user name:eee (generally same as pop3 login user name) smtp login password:fff (generally same as pop3 login password) Suppose your proxy address is 192. 1 You need to change your mail account information in your Outlook as: login user name(account):aaa#ccc login password:bbb pop3 server address(incoming server address):192. 1 smtp server address(outcoming server address):192. 1 smtp login user name:eee#ddd smtp login password:fff Notes: if you are using office 2002 or office XP, you need install office sp1 first.
16
5. 7 Outlook Express for News (NNTP)
Choose the configured News server in Outlook Express and right click menu-> Properties-> Server. Suppose the original server name is “”. You need to change the server name to the proxy server’s address. Choose “This server requests to log on”. Fill in “” in account. Leave “Password” blank. Check “Remember Password”. Note: If the News server you log onto isn’t free of charge, then the account number and password are needed. Your account name should be revised to “old account name#original News server address”.
5. 8 CuteFTP
Menu “Edit”-> “Settings”-> “Connection”-> In “Firewall” tab: fill in proxy server address after “Host”. Port is 2121. Choose “USER [email protected]” in “Type”. Check “Enable firewall access”.
5. 9 CuteFtp Pro
Open menu “Edit”-> “Global Settings”-> “Connection”-> “SOCKS4 & 5” Choose “Use the highlighted Socks server when connecting”; click button “Add”, delete “
5. 10 ICQ
Launch ICQ-> Menu “Main”-> Preferences -> “Connection”: Select “Use Firewall” in “Server” tab. Select “Socks5” in “Proxy” tab. “Firewall”: Select “Socks5”. Fill proxy address in “Host”, “Port” is 1080. Select “use proxy to resolve hostnames”.
5. 11 MSN Messenger
Menu “Tool” -> “Options” -> In “Connection” tab, check “I use proxy server”, choose SOCKS 5 in type, fill local proxy servers IP address in “Server”. Port is 1080.
5. 12 Voice/video chat software
You need to install SocksCap32 at client, add voice chat software into SocksCap32 and launch it from SocksCap32. 17
For specific guide, please refer to. Currently CCProxy cannot support MSN and Yahoo voice/video chat. If you want to use voice/video chat, we suggest you use skype. In skype, the Internet Explorer proxy settings are used.
5. 13 NetMeeting
As NetMeeting doesn’t support proxy setting, SocksCap is needed. For a specific user guide, please refer to
5. 14 Real Player
Take RealPlayer 8. 0 for example: Proxy server address is 192. RealPlayer port is 808. Step1: Menu “View”–>”Preferences”–>”Transport” Choose “Use specified transports” Note: Don’t choose “Use specific UDP port(s)”.
(Figure-1) Step 2: Click “RTSP Settings”. Check all the three choices under “Use TCP to Connect to Server”.
18
(Figure-2) Step3″: Choose “PNA Settings” in Figure-1. Check choice “Use HTTP Only”.
(Figure-3) Step4: Menu “View”–>”Preferences”–>”Proxy” Check “Use RTSP proxy”. Fill 192. 1 in the first blank. Port is 808. Check “Manually configure HTTP proxy” Fill 192. Note: Don’t choose “Use PNA proxy”.
19
(Figure-4)
5. 15 Windows Media Player
CCProxy only supports Media Player 7. 0 or above. Local Proxy Server address: 192. Proxy port for MediaPlayer: 1080 Proxy port for HTTP: 808 Menu “Tools”–> “Options”–> “Network”
20
(Figure-1) As it is shown in above figure, in Proxy Settings box, move cursor to HTTP, click button “Configure”. Change settings to the way shown in figure-2.
21
(Figure-2) Move cursor to “MMS”, click button “configure”, and change the settings to the way shown in figure-3.
(Figure-3) Note: The ports for HTTP and MMS in figure-2 and figure-3 are different. The port for HTTP is 808, while the port for MMS is 1080.
5. 16 NetTerm for BBS telnet
Open menu “File”-> “Phone Directory”. Choose the BBS in the list you want to log on. E. g. Follow info will be shown: Host Name is; No entry in Host/IP and telnet port is 23. Fill in proxy server address in Host/IP. Click button “Connect”. Follow info will be showed on blue screen: CCProxy Telnet>CCProxy… Input “open “, click “Enter” key. Now you can log on
5. 17 Java application for Game/Chat room
First of all, you need to install Sun JRE (Java Runtime Environment). You can download it free at. After installation, 1. Go to Control Panel 2. Double click the “Java Plug-in” icon 3. Click the “Proxies” Tab
22
4. Make sure that the “Use Browser Settings” checkbox is checked. If it is not, then check it and hit the “Apply” button to save your changes. Doing this will cause the JRE to use the Web browser’s proxy settings for all Internet connections. Close all browser windows. Restart the browser and try to load the applet.
5. 18 Norton AntiVirus for live update
First, set HTTP proxy in IE. Open Live Update in Norton AntiVirus. Popup “Live Update” dialog box and click button “Configure”. Popup dialog box “Live Update Configuration”. In “ISP” tab, check “the Internet Options in Control Panel”. In “Proxy” tab, check “I want to use my Internet Explorer Proxy Settings”.
5. 19 AVG update
Suppose proxy address is 192. AVG -> Update Manager -> Settings -> Proxy -> User proxy server, Server: 192. 1, Port 808.
5. 20 Windows XP update
Suppose proxy address is 192. 1 and port is 808. Click Start, click Run, type cmd, and then click OK. At the command prompt, type proxycfg -p 192. 1:808, and then press ENTER. (Or type proxycfg -u, and then press ENTER)
5. 21 Other software
If the software has the proxy option (generally in network settings or system settings) for proxy configuration, you can configure the proxy according to the relative protocols and ports. Generally you
23
can use SOCKS proxy settings (port is 1080) or HTTP proxy settings (port is 808). Also you can search proxy settings in google. For example, you can search “skype proxy settings” to find out how to set up proxy for skype. Otherwise, you will need to install SocksCap32, software from NEC on the client and add this software to SocksCap32. For specific guide, please refer to
24
6 Account Management
In this section we will talk about the account management of CCProxy. CCProxy features powerful Internet access control function. It helps the administrator to manage clients easily and efficiently. You can click the “Account” button on the toolbar of CCProxy to manage your account. The account management includes “Account List”, “Web Filter” and “Time Schedule”. We will introduce all of them in detail below.
6. 1 Account Manager
Permitted Category: There are two options – “Permit All” and “Permit Only”. “Permit All” means all
proxy clients can access the Internet via CC Proxy. “Permit Only” means only the clients which have been given permission can access the Internet via CC Proxy.
Auth Type: CCProxy account authentication supports IP Address, MAC Address and User/Password.
Each account can be authenticated with these auth types. The “User/Password ” authentication is only valid to web proxy and socks5 proxy service. Web Filter: The administrator can define the filter rule here. CCProxy supports “Web Site Filter”(Permit or forbidden), “Forbidden URL”(Web URL filter) and “Forbidden Content”(Web Content Filter). Time Schedule is used to control the clients’ on-line time. New, Edit, Delete and Select All: These are used to create, edit or delete the account list. Auto Scan: This is used to scan the computers on the LAN and get the computers’ information automatically. For example, computer name, IP address and MAC address. Export and Import: Export is used to save the account list information to a specific folder. Import is used to load account information from a specific file. These two features function just like the backup and restore operations of account list. NT User Auth: If you check this box, CCProxy will import the Active Directory accounts automatically. You can input the AD server name in the edit box. “. ” means local server. Flow Stats displays the bandwidth usage of each account.
6. 2 Create New Account
“Account -> Permit Category -> Permit Only -> New”. Enable is used to enable or disable the account. User/Group Name is used to define each account. It’s also used as the username for User/password authentication. Password is used to define the account’s password. IP Address/IP Range: you can input a single IP or IP range. For example: 192. 1 or 192. 1-192. MAC Address is used to define the client’s MAC address. Click the “? ” to get the MAC address by the IP
25
address or computer name. As Group means this account is defined as a group account. Belongs to Group: you can add this account to any defined group. Maximum Connections refers to the maximum simultaneous connections. The value -1 means no limitation. Bandwidth refers to the maximum bandwidth of each connection. Services is used to choose the permitted services of this account. Web Filter: you can choose a defined web filter here. Time Schedule: you can choose a defined time schedule here. Auto disable at: the account will be disabled at this defined time automatically.
6. 3 Web Filter
Web filter can effectively restrict clients access to particular web sites. “Account -> Web Filter” Web Filter includes Site Filter, URL Filter and Content Filter. Web Filter Name is used to define different web filter rules. Site Filter: Input the sites you want to filter in the edit box. Site filter supports wildcard character (*,? ). Multiple sites should be divided by semicolon. For example: *;???. ;* Also you can define port filter. For example: *:433, *;*. *; You can also input a web filter file name here. The web filter file format is one web filter for one line. For example: *; *. ; **; *; Permitted Sites: clients can only access sites which are included in the site filters. Forbidden Sites: clients can not access sites which are included in the site filters. Forbidden URL: You can define the URL filter here. You can input whole or partial URLs. For example:;*;*/mail/; Forbidden URL is different from Site Filter. Site Filter only applies to the web host name and port, whereas Forbidden URL applies to the whole URL address. Content Prohibited can filter web pages with specific characters. If the web page includes such characters, it will be banned. Input the characters you want to name in the edit box. Multiple characters should be divided by semicolon. For example: chat;travel. Note: This step is only to define a web filter rule. If you want to apply it to a specific account, you should edit the account’s property and select the web filter rule for this account.
26
6. 4 Time Schedule
Time schedule is used to control the clients’ on-line time. “Account -> Time Schedule” Time Schedule Name is used to define different time schedule rules. Sunday to Saturday: This is used to set different on-line time schedules for business days. You can edit time schedule directly in the edit box or click the button besides edit box. In the popup “Time Table” dialog box, there are 24 time range choices. Note:”01:00″ means Internet access is allowed from 00:00 to 01:00. “Apply to, ” means the time control of the day is only effective for checked choices. Note: This step is only to define a time schedule rule. If you want to apply it to the specific account, you should edit the account’s property and select the time schedule rule for this account.
27
7 Main interface
7. 1 Toolbar Zone
Start: To start CCProxy. Stop: To stop CCProxy. Options: To open the options dialog box. Account: To open the account dialog box. Register: To enter registration code. Monitor: To open the online logging monitor (more). Hide: To hide the interface. Help: Get help document.
7. 2 Online Information Zone
Yellow curve: the current amount of bandwidth. Green curve: the current number of connections.
Tips: If you double click this zone, it will open the monitor dialog box.
7. 3 Product Logo Zone
Display the product logo. Tips: If you double click this zone, it will open the log information dialog box.
7. 4 System Information Zone
U: Double click this option to check for upgrade information. If there is a new version, it will open the upgrade dialog box. 0/0: To display the number of online connections and accounts. The left number is the amount of online connections. The right number is the number of online accounts. Tips: Double click this zone and you will open the Windows system management. Time: To display the server time. Tips: Double click this zone and you can go to the installation folder of CCProxy.
28
8 Options dialog box
Open the options dialog box by clicking “options”. Mail: To start mail proxy service. DNS: To start DNS proxy service. Web Cached: If checked, the HTTP proxy will load and store web pages to the proxy cache. Remote Dial-up: To enable remote dial-up from clients. Auto Startup: If checked, CCProxy interface will start automatically when Windows starts up. Port Map: To start port map service. You can click the “E” button to add or edit the port map rules. HTTP/RTSP: To start HTTP and RTSP proxy service and set proxy port. Secure: To start secure (HTTPS, SSL) proxy service and set proxy port. FTP (Web): To start web ftp proxy service and set proxy port. Gopher: To start gopher proxy service and set proxy port. SOCKS/MMS: To start SOCKS and MMS proxy service and set proxy port. FTP: To start FTP proxy service and set proxy port. Telnet: To start Telnet proxy service and set proxy port. News: To start News and NNTP proxy service and set proxy port. Notes: FTP (Web) proxy service is different from FTP proxy service. FTP (Web) is used in IE browser. IE access FTP site via FTP (Web) proxy service. And FTP proxy service is used on FTP client software such as CuteFTP, WS-FTP and etc. Local IP Address: To display and set local IP address. If you check “Auto Detect”, CCProxy will auto detect which IP is the local IP address and display it in the combox list. If you find that the result is incorrect, you need to uncheck “Auto Detect” and choose the correct local IP address from the list. You can select multiple IP addresses as the local IP address. When you choose one local IP address, you need to check the checkbox beside it. NT Service: If this is checked, CCProxy will be run as a Windows service. Advanced: To open the advanced options dialog box.
29
9 Advanced Options
You can open an advanced options dialog box by selecting “Options -> Advanced”. There are 7 tabs in this dialog box. Dial-up: To configure the dial-up service. Cache: To configure the web-cached function, i. cache size, cache update time. Cascading: To configure the cascading proxy, also called parent proxy, service. Log: To configure the proxy logging service, i. log size and log type etc. Mail: To configure the mail proxy service. You can change the mail proxy port here. Network: To configure the proxy network settings such as server IP address binding, socket idle timeout, etc. Others: To configure other proxy settings such as interface language and remote admin etc.
9. 1 Dial-up Page
Dial-up Entries: To select dial-up entries Dial-up User Name: To set the dial-up user name. Dial-up Password: To set the dial-up password. Idle Disconnect Minutes: To set the disconnect minutes. Enable Auto Dial-up: To select which service can be dial-up automatically.
9. 2 Cache Page
CCProxy’s web caching is based on the IE cache storage technology. CCProxy will load and store the web pages into the IE cache files on the server. Cache Update Time: To set the update interval of the cache. Always Load from Cache: If this is checked, the HTTP proxy will always load web pages from the
CCProxy 8.0.7.22 Download | TechSpot
CC Proxy Server can act as an HTTP, mail, FTP, SOCKS, news, telnet and HTTPS proxy server. It features powerful account management functions, including Internet access control, bandwidth control, Internet web filtering, content filtering and time control. It also provides web caching, online access monitoring, access logging and bandwidth usage statistics functions.
As a Window proxy server software, CCProxy is compatible with Windows 7, Windows Server 2008, Windows Server 2003, Windows XP and Vista. Many people use CCProxy for Windows internet sharing such as Windows XP Internet sharing, Win 7 Internet sharing and so on.
CCProxy can act as web proxy software, which enables you to browse web pages, download files and send and receive e-mails via web browsers such as IE, Chrome, Firefox etc. The web caching function of web proxy server can increase the Internet surfing speed.
CCProxy provides powerful management functions including several ways to control the Internet access on the LAN. They are IP address, IP range, MAC address, User Name/Password and group. It can also merge with Windows Active Directory. As of now, CCProxy is one of the most popular Windows proxy server softwares.
The web filtering and content filtering function of CCProxy can restrict clients’ access to particular sites. It will help you to ensure that employees concentrate on their work or that children are unable to visit unsuitable sites. That’s why CCProxy is also known as web filter proxy server. The time schedule function of CC proxy server software is used to control the users’ online time.
Different proxy services can be allocated to different users. For example, some of them could be restricted to browsing web pages and others to sending and receiving e-mails.
Use proxy server which is built by CCProxy, you can allocate proxy client bandwidth as appropriate. That is to say, with such proxy server software you can easily control the users’ Internet surfing speed and balance the bandwidth to avoid the network traffic jams that can be caused by users who download big files or watch online media.
Access logging and online access monitoring will help you record the clients’ Internet access activities.
Frequently Asked Questions about how to configure ccproxy
How do I use CCProxy on Windows?
Set up a proxy manuallyOpen Settings.Click Network & Internet. … Click Proxy. … In the Manual Proxy Setup section, set the Use a Proxy Server switch to On.In the Address field, type the IP address.In the Port field, type the port.Click Save; then close the Settings window.
How do I setup a proxy server?
Connecting to a proxy serverOpen Chrome.Open the Customize and control Google Chrome menu.Click Settings > System > Open proxy settings.Use Internet Properties to set up a connection for your type of network: … Enter the address of your proxy server, and a proxy port number.Click OK to save your changes.
What is CCProxy FTP service?
Proxy Server CCProxy is easy-to-use and powerful Internet connection sharing software. … And It features powerful account management functions, including Internet access control, bandwidth control, Internet web filtering, content filtering and time control.