Install Vpn On Chromecast
How to set up and use Chromecast VPN – Surfshark
2021, August 24 · 8 min read
So you have a TV, a Chromecast dongle, and a VPN app, but no idea how to make them play together? Have no fear, for this guide is here. We’ll provide you with all the information that you need to provide a VPN connection to your Chromecast.
Surfshark does not encourage using a VPN in ways that would potentially violate Terms of Service of streaming service providers.
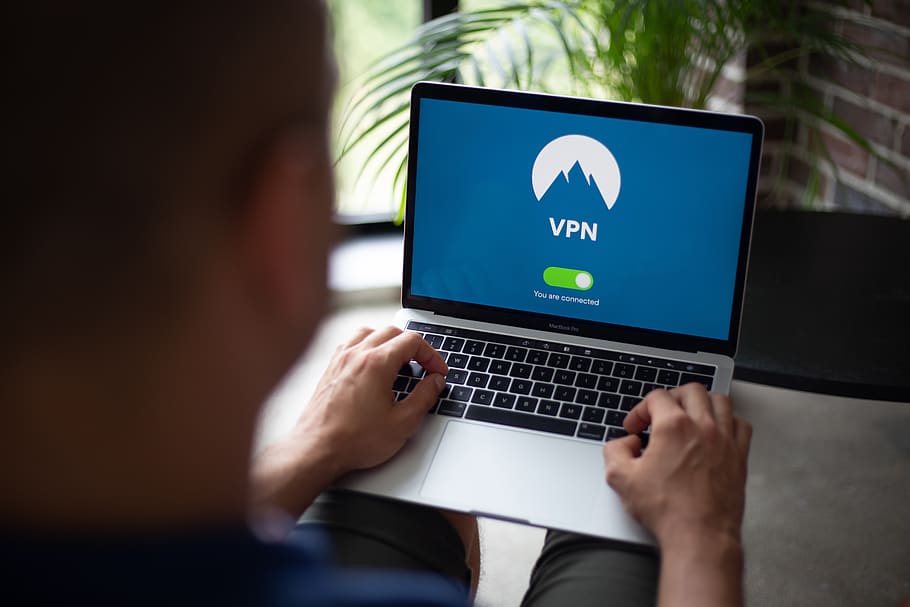
4 steps to use Chromecast with a VPN
Secure your protection and protect your online privacy by using a VPN on Chromecast!
How? It’s easy, here are the steps:
Set up a VPN on your home or virtual router.
Pick connect to a VPN server.
Connect your Chromecast to your router.
Stream in peace and quiet.
Now, let’s get you going on that router setup!
Step 1A. Using Chromecast with a VPN: physical router
For this approach, you’ll need a VPN client-compatible router and a VPN app.
Note: Some VPN routers aren’t VPN-compatible. However, with a bit of effort, they can be made to be VPN-compatible. The process is a bit involved – check out our instructions for making a router VPN-ready.
“What’s a VPN client-compatible router? ” you ask? Well, it’s a router that is ready for a VPN app to be installed on it. You can check the router’s manual or do a quick Google search to find it out. Once you do, you can follow these straightforward steps.
Open the router configuration panel. Use this by entering your router’s IP address in your browser, just like a URL. Finding the IP is different for every operating system.
For Windows 10 users, this means opening the “Start” menu and typing in “Command Prompt” and opening this program. There, you have to type in “ipconfig” and press “Enter. ” You should see your router’s IP address on the “Default Gateway” line.
Mac users should start by going to “System Preferences. ” Then you should find and click the “Network” icon, select your network connection (Wi-Fi, wired, whatever), and click the “Advanced” button at the bottom. Then go to the “Network” window, select the “TCP/IP” tab and see your router’s IP address listed as “Router. ”
Follow your VPN app’s guidelines. Every VPN app has a different approach when it comes to setting up on different router firmware types. For example, you can take a look at Surfshark’s instructions for setting up a VPN on Asus routers, DD-WRT routers, and Tomato routers. More can be found in the support section.
Check if you’re connected to the internet. If not, check if you carried out the instructions correctly. If you’re a Surfshark user, contact Surfshark customer support.
Step 1B. Using Chromecast with a VPN: virtual router
Sometimes, you just don’t have a router handy. Or maybe you’re not feeling like tackling the issue of making your physical router VPN-ready. In this case, you can turn your PC into a virtual router.
Note: This method only works with Windows at the moment.
Setting up a virtual router for Windows 10
Go to “Settings, ” then “Network and Internet, ” and then “Mobile Hotspot. ”
Switch the “Mobile Hotspot” ON.
On the right, under “Related settings” click “Change adapter options. ”
In the new window, right-click on your VPN app’s connection and choose “Properties. ”
Navigate to the “Sharing Tab, ” tick the “Allow other network users to connect through this computer’s internet connection” box, and choose your newly-created hotspot in the drop-down menu. Click “OK. ”
Your virtual router is good to go!
Setting up a virtual router for older Windows OS
If you want to set up a virtual router for you Chromecast on older Windows OS, see below:
Press the Windows + S keys at the same time.
Type in “cmd. ”
Right-click “Command Prompt” and select “Run as Administrator” in the drop-down menu.
Type in “netsh wlan set hostednetwork mode=allow ssid=[NETWORKNAME] key=[PASSWORD]” and do not press “Enter. ”
Replace [NETWORKNAME] the name for your new network
Replace [PASSWORD] with the password for your new network
Press “Enter. ”
Press the Windows + R keys at the same time
Type in “” and click “OK. ”
Find the connection that has the name that you chose in Step #5.
Remember the title (the first line) of this connection.
Find your VPN connection. In this example, it’s the Surfshark one.
Right-click on it and select “Properties” in the drop-down menu.
Go to the “Sharing Tab, ” check the “Allow other network users to connect through this computer’s internet connection” box, and choose the hotspot with the title you noted in Step #11 in the drop-down menu. ”
Your virtual router is ready!
Step 2. Setting up Chromecast with a VPN when a router is ready
Once the router is set up, and the internet is working, finish setting up your VPN for Chromecast by doing this:
Connect to a VPN server.
Connect the device you use to control Chromecast to the Wi-Fi network that’s now VPN-protected. It’s your phone or tablet with the Google Home app on it.
Set up your Chromecast if you haven’t done so. You can follow the official Google guidelines.
At the “Connect Chromecast to your Wi-Fi” step, select the VPN network.
If you already have Chromecast setup, connect it to the VPN-protected Wi-Fi network.
Stream to your heart’s content.
Chromecast and a VPN: the benefits
Why use a VPN with Chromecast? Here are some good reasons:
Overcome censorship: the country you’re in banned your favorite Cast-capable apps? If you have a VPN running, you can easily bypass that.
Stream in privacy: with a VPN on, your ISP can’t record your internet browsing data. So stream whatever you want without leaving a trace!
Avoid internet throttling: when it comes to selectively and purposefully slowing down your internet connection, ISPs consider video streaming among the top targets. Reclaim your internet speed and stream without interruptions with a VPN.
Don’t Chromecast unprotected
Setting up a VPN to work with Chromecast is well worth the effort. If Chromecast gives you the freedom to turn any TV into a smart TV, then a VPN gives you the ability to use your Cast-friendly service without streaming your data to ISPs, advertisers and other snoopers.
Start Casting with Surfshark!
with a 30-day money-back guarantee
Get started
Written by
Martynas Klimas
Knows as much about VPN as it is healthy for someone who isn’t a VPN developer
![How to Use a VPN with Chromecast [August 2021] - Alphr](https://proxyboys.net/wp-content/uploads/2021/11/dell-xps-15-lid2-800x533-c-720x720-1.jpg "How to Use a VPN with Chromecast [August 2021] - Alphr")
How to Use a VPN with Chromecast [August 2021] – Alphr
Disclaimer: Some pages on this site may include an affiliate link. This does not effect our editorial in any way. When it comes to staying secure online, nothing does a better job than a VPN. Though they aren’t flawless, VPNs help you stay protected by routing your traffic anonymously through servers around the world, in order to make your footprints disappear. Whether you’re just trying to avoid being tracked by advertisers, or you want to change your location in order to stream out-of-region Netflix movies, using a VPN when browsing online is a course, a VPN doesn’t do you any good if you’re leaving behind breadcrumbs that lead right to your door. That’s exactly what could happen if you use a Chromecast without proper VPN coverage. You might have your VPN running on your mobile device, but the minute you cast over to your television for movie night, you’re risking being tracked again. Is there a way to use your VPN with Chromecast, or are you doomed to be caught no matter what? How to Connect a Chromecast to Your VPNThis section will show how to connect your Chromecast to a VPN. First, it’s important to understand that you’ll need to set up your router or a virtual network on a PC or Mac to do this. We’ll explain how to do that further below. Limited Deal: 3 months FREE! You will also need to download and set up the Google Home app on an iOS or Android device. Once set up, you need to plug your Chromecast into a wall outlet and the screen you’ll be using it with. Then, you can follow these steps to connect your Chromecast to your We are using a virtual network to connect our Chromecast to our the Google Home app and select the Chromecast device you’re working with. Then, under Connect Chromecast to your Wi-Fi, select the VPN network you a VPN with Standard ChromecastsObviously, your Chromecast requires an internet connection to work properly, running right over your home network to allow for casting movies, shows, and music from your phone. Unlike devices like Amazon’s Fire Stick or Apple TV, Google’s Chromecast doesn’t run dedicated apps (or at least, it didn’t use to—more on that at the end of this article), so there’s no way to install a VPN app on your device. Limited Deal: 3 months FREE! Likewise, there’s no way to dive into the settings of your Chromecast to change its network settings as if it were a smartphone, which means you might be out of at least, you would be, if VPNs weren’t flexible. While you can’t install a VPN directly on your device, you can set up your VPN to work natively with your router, moving all traffic on your home network through your VPN. This isn’t quite as simple as installing a VPN on your computer or smartphone, but if you have the time, it can really be worth securing your entire routersYou can configure a virtual router on a Windows or Mac computer but if you have a VPN-enabled router, it is safer and easier to use that. Routing all of your internet traffic through the router by default means no configuration on any computers, phones, or IoT devices in your home. You don’t need to install VPN software and you don’t need to remember to turn it on. Limited Deal: 3 months FREE! If you don’t have a VPN-enabled router (and you likely do, since setting up a VPN is mostly software-based), you can potentially upgrade the firmware to DD-WRT or Tomato. Either of these work with a range of router makes and models. If you have a compatible router, you could upgrade your firmware to one of these and turn your $100 router into something that would normally cost closer to $ to Set Up ExpressVPN Using a Virtual Router Using a MacExpressVPN is compatible with a great variety of routers. You can see if yours is on the list on this website. Assuming you have a compatible router, you can follow these steps to use your VPN with your Chromecast:Register your router’s IP Address with ExpressVPN on this in and click on DNS Settings on the Register my IP address next to your router’s IP IP Address is automatically registered when you complete these, we’ll set up your VPN on your Mac. Here’s how:Click on the Apple icon in the upper left corner of your Mac and click on System Preferences. Then, click on on the ‘+’ symbol in the lower left your connection (ExpressVPN in this example), select Default next to Configuration. Type 12345678 in the Server Address box. And finally, paste the username your retrieved from the ExpressVPN website in the instructions the box to Show VPN status in menu bar and click Authentication the password we copied in the instructions above. Then, enter 12345678 next to the Share Secret Ok in the pop-up window. Then, from the Network page, click the box to Send all traffic over VPN connection. Then, click nally, click Apply in the lower right you’ve registered your IP Address, it’s time to set up sharing on your Mac. Don’t worry, this process is easy. Here’s what to do: Open the System Preferences just as we did above. Then, click on the box next to Internet Sharing on the to Share your connection from: select the VPN network you’ve set nally, check the Wi-Fi box beside To computer using:Now, you can go to the Google Home app on your smartphone and connect it to the Network you’ve just created. When the connection is set, you can stream content to your Chromecast under the guise of a to Set Up ExpressVPN Using a Virtual Router Using a PCA PC isn’t much different than a Mac as it too can act as a virtual router for your VPN. There is some information you’ll need to get directly from your VPN provider. Once you’ve collected the data, follow these steps:Install your VPN on your PC. Then, sign into your account and get your VPN up and, open Settings and click on Network &, click on Mobile Hotspot, it’s in the menu on the left-side of the screen. Then, click on the the Share my internet connection with other devices toggle button to turn it on. From here, click on Change adapter options in the menu on the right-side of the screen. Now, right-click on the adapter for your VPN and select Properties. Next, click on the Sharing tab at the top of the new window. Then, click the checkbox for Allow other network users to connect through this computer’s internet connection and then select your newly created hotspot from the list of connections. Select OK when you’re ’ve now setup a virtual router on Windows tting up a VPN on Your RouterSetting up a VPN on your router will require you to know the VPN settings from your provider. You will need the URL or IP address of the VPN server, your username, password, and any security settings the provider uses. This will all usually be in the account section of the provider’s good providers will offer guides and walkthroughs to set up their services on your router. It makes sense to follow them if they have them. Some router providers provide their own firmware you can install on your router but I would suggest using configuration instead as it retains control over what your router does. Typical router configuration should go something like this:Add the DNS and DHCP settings as provided by your VPN provider to the router. Disable IPv6 if a VPN server address from those available from your TCP or UDP as a tunnel an encryption method (AES) your VPN username and password. You’ll want to look at your VPN of choice to see specific instructions for setting up your router. Our top pick for VPNs, ExpressVPN, has their instructions right Google DNSNext, you need to block Google DNS in order for the Chromecast to work properly over a VPN. This is more router configuration but is very straightforward. You essentially create a static route that bypasses Google DNS. This won’t work if you already use Google DNS on your router. If you want to use a Chromecast over VPN, you will have to change your DNS, it is difficult to be specific as router configuration differs between manufacturers, but on my Linksys router I had to do this:Log into the router and select Connectivity and then Advanced Add Static Route and give it a Destination IP as 8. 8. 8 (Google DNS address) the subnet mask as the gateway address as your router’s IP for Google’s other DNS address 8. 4. 4After you save this configuration, you should be able to stream using your Chromecast without a problem. You will also benefit from enhanced security with all your internet traffic. Your ISP, government, and anyone else who is interested in what you do online will no longer be able to see what you’re doing and you have taken a huge stride in improving your online romecast with Google TVIt’s been a while since we got a new Chromecast, but we finally saw the launch of Google’s new streaming stick last fall. Although it’s still called a Chromecast and retains the classic puck shape we’ve come to know and love, this is a new device through and through. In fact, it’s the biggest change to the Chromecast we’ve seen yet, combining the utility of Google Cast with a remote and a brand-new interface called “Google TV, ” based on Android you’re unfamiliar with Android TV, that’s okay—here’s what matters to you. Owners of this new Chromecast (which runs $49 and supports 4K and HDR out of the box, marking a price drop from the older Chromecast Ultra) can gain access to the Play Store, which makes it possible to download a number of VPNs for Google TV, including but not limited to:ExpressVPNNordVPNSurfsharkCyberGhostIPVanishThis means that, instead of being forced to set up your VPN through external means, you can rely on basic apps through Android as you would on most other smart devices. It’s a notable addition and makes upgrading to Google’s new Chromecast a much more tempting to Keep in Mind When using a VPNThe downside of VPNs is that all of your traffic will route through the VPN unless you disable the VPN at the router level. For the most part, this shouldn’t cause any issues, but if you select a VPN endpoint in a different country or somewhere not close to you, any location-aware website will get confused and require manual intervention. Again, this may not be an issue for you, but it’s worth being aware of the consequences. For example, if you shop online, you may receive different listings and pricing than you would in your home country. It’s a small issue—and if you set your VPN to route in your home country, one that won’t matter to you at all—but something to bear in mind depending on how you use the other main downside of VPNs comes from your endpoint locations. VPN endpoints are where your secure tunnel ends and reverts back to a standard internet connection. Most VPN providers spread hundreds of endpoints across the country, but it’s still a good idea to make sure you’re on a stable connection. Look for a VPN provider that has endpoints in your city or region, in addition to other states and countries. That way, you get maximum spread and can choose your locations depending on your used to be an issue with VPN thanks to its traffic overhead. This is the extra data generated by the security of a VPN and the fact traffic has to travel further. This is less of an issue now, especially if you use a good-quality VPN provider. TechJunkie has a bunch of articles on choosing a VPN provider to help with that.

How to use the Google Chromecast behind a VPN – Nneko Branche
VPN services are essential tools that are not only adept at helping us to protect our privacy on the internet but are also effective at circumventing restrictions like those mentioned previously in our how to VPN post. Whether these barriers are imposed by corporate policies and company firewalls in the office or they are of the arbitrary content blocking by IP nature common with online streaming services, a VPN is the ideal candidate to overcome such pesky limitations.
If you are already familiar with this concept and just want to know how to get the Chromecast working feel free to skip to the tutorial section further down. Otherwise read on.
VPNs by design tunnel traffic originating from one network through machines on another network or an array of networks before those packets reach their final intended destination. The upside here is that by adding encryption one can ensure that their communication remains truly anonymous and private. However, for most users the real benefit is that this mechanism can fool many online services such as Netflix, Hulu etc into treating you and your requests as if they are made from another country outside of your present physical location.
This is particularly useful for users who want to get around the nuisances associated with the unavailability of certain features or services in their present region or the anemic content libraries presented even when those services are available. For instance, if you chose a VPN service that provides servers in the United States that relay your internet traffic then this instantly allows you to view everything just as a regular US consumer would. Basically, as far as Netflix or any other internet service is concerned when the packet belonging to your request reaches them it comes from a computer based in the USA. There you have it. Viola! a world of content and possibilities is now open purely due to the use of a VPN. For the uninitiated this user choice Best of Five poll from 2014 done by Lifehacker lists some good VPN providers.
However, notwithstanding their benefits VPNs have three main disadvantages associated with them. The first is that some speed will be sacrificed because you are essentially taking a longer route to the end destination by relaying traffic through a middle man. Fortunately, any speed drawbacks can be mitigated by selecting a decent provider from the list above and or sacrificing privacy by reducing your encryption or altering your connection method/protocol.
The second drawback is that it can be too technical an endeavour for some to configure their devices to connect to the VPN service. Again our how to guide here will alleviate this to some extent. Luckily, most providers are addressing the usability issues and have native apps for desktops, laptops, smartphones, TVs, tablets and even routers which is taking some of the hassle out of the setup. However, the final hassle is the big one and that is convenience. It can be downright inconvenient on occasion to use a VPN especially when one needs to inter operate with other devices around the home or office that are not connected to the VPN service.
It is this inconvenience challenge that will be addressed in the remainder of the article. Specifically, you will be shown how to stream content from a VPN connected device (Laptop, phone etc) to your TV using the Google Chromecast. Don’t know what a Chromecast is? Read about it on this page.
Also, given that it is a relatively cost effective way to get streaming content on the big screen for those without a smart TV you may also want to Buy One.
Ok, now that you have VPN and bought a Chromecast let’s get started with the tutorial.
Getting the Chromecast working behind a VPN
By default the Chromecast will not work when you are streaming from a device that is on a VPN. The reason for this is simple. A Chromecast device requires communication between it and the other devices on the same network. If it cannot speak to those devices then there is no way to command it go on the internet and fetch the relevant content. When you have connected your computer or other handheld device to the VPN it and the Chromecast are effectively on two separate networks and can no longer talk to each other.
Even if it were somehow magically possible (it is not at least for the time being) for them to communicate without being on the same network you would still have the problem of the casting happening from the Chromecast outside of the VPN which would mean that it cannot be done securely and that it would also not be able to fetch the restricted material for which you have the VPN in the first place.
There are three ways around this, the first and recommended way is to cast using a chrome tab, second to connect the home router to the VPN and third to use an ad-hoc wireless networked to share the VPN. The first method is by far the easiest but if you are hardcore and decide to try to other two then both require connecting the Chromecast to the VPN service. The first is to configure the home router to connect to the VPN thus putting everything on the home network over the VPN including the Chromecast. This is certainly effective but most people either do not have a home WiFi router capable of establishing a VPN tunnel or the feature is omitted from the user interface even if the underlying hardware supports it. To get around that you would need to flash the router using custom firmware either of the DD WRT or Tomato variety.
Most end users are too scared to take the risk of nuking their router by flashing it with community firmware or have none and do not want to have any of the technical capabilities needed. This post is mostly for those people. Although, unfortunately there is still some technical tasks required.
Basically, to get your Chromecast on a VPN you will need to setup an ad-hoc hotspot using your laptop. This hotspot will forward traffic over your VPN connection and it is this hotspot that the cast will connect to. In Windows terminology these hotspots are known as hostednetworks.
Configuring a Wireless Hosted Network
Again, the recommended and easy method is to follow what is detailed here. However, if you are very technically talented and want to try something slightly more satisfying and way more challenging then read on.
Open a Administrative Command Prompt on Windows.
Type netsh wlan show drivers at the prompt. Ensure that the driver property labelled Hosted network supported has a value of yes associated with it. Should the value not show a yes then it means that your laptop wireless card is not able support creating the hotspot and you will not be able to complete the remaining tutorial steps. Nowadays, almost all chipsets support this feature making this check a formality. Nevertheless, still verify to avoid frustration in the following steps.
Disable bluetooth on the wireless card and ensure that either the Microsoft Virtual WiFi Miniport Adapter or the Microsoft Virtual Host Network Adapter is enabled. Goto Start Menu->Control Panel->System->Device Manager->Network adapters. Note, that you will need to right click on the specific adapter to Enable or Disable the device. Some devices may also be hidden to reveal them select the View->Show hidden devices option from the menubar.
Type netsh wlan set hostednetwork mode=allow ssid=homenetwork key=changeme KeyUsage=persistent to create the new hosted network. The mode option turns on the network card’s hotspot feature while the ssid is the wireless networks broadcast name, key is the password which is set to “changeme” and KeyUsage allows the password to be persistent across sessions. For clarity the SSID can be named anything you like. Same goes for the password choice.
Validate the configuration by displaying the previously created network profile. Type netsh wlan show hostednetwork.
Start the virtual hotspot by typing netsh wlan start hostednetwork.
Troubleshooting Hosted Network Creation
A few users may get an error after step 4 like the following:
The hosted network couldn’t be started.
The group or resource is not in the correct state to perform the requested operation.
Usually this is caused by some conflict with the driver on Windows or having bluetooth enabled on the wireless network interface. Double check that all the devices in the note on Step 3 are in the correct state. Then retry step 4. Alternatively, you may need to update your wireless drivers.
Sharing the VPN over the homenetwork Hotspot.
Open the “Network and Sharing Center. ” You can do this by right clicking the wireless icon in the taskbar or from the control panel
Select “Change adapter settings” in the left pane.
Right Click the adapter that manages the VPN connection. Select the Properties option.
Go to the “Sharing” tab. Tick both checkboxes under the Internet Connection Sharing panel. In the drop down under Home networking connection: select the Hosted Virtual Network (This is the “homenetwork”) that was created earlier.
Connect the Chromecast to the Hotspot
We are now at the stage final stage. By now you will see an additional network named “homenetwork” when you scan for wireless signals from the devices in the home. All that is needed now is to tell the Chromecast dongle to use this network instead of your regular home WiFi.
To do this simply rerun the setup by navigating to
It is important to note here that you cannot run the setup from the laptop running the hotspot which hosts the “homenetwork” hosted virtual network. Reason being that during the initiation the Chromecast app will disconnect the WiFi on the laptop which will also drop the hotspot preventing the dongle form connecting and hence from completing the setup and registration.
Run the setup from your smartphone/tablet or another laptop instead. That’s it! You can now cast away on VPN. Browse the tutorials for other similar articles.
Sign up to our mailing list to read more like this.
We value your time. You easily can unsubscribe at any time.
Frequently Asked Questions about install vpn on chromecast
Can you put a VPN on Chromecast?
Secure and streaming friendly. You will also need to download and set up the Google Home app on an iOS or Android device. … Open the Google Home app and select the Chromecast device you’re working with. Then, under Connect Chromecast to your Wi-Fi, select the VPN network you setup.
Why does my Chromecast not work with VPN?
By default the Chromecast will not work when you are streaming from a device that is on a VPN. The reason for this is simple. A Chromecast device requires communication between it and the other devices on the same network.Aug 16, 2015
How do I cast screen with VPN?
How to screencast an Android phone to TV with VPNConnect your Android phone to the TV via HDMI cable. This method is very simple and does not require much effort. … Other wired connections. As I mentioned above, using an HDMI is the simplest method. … Mirroring screen wirelessly.Aug 6, 2020